Welcome to Moda Fabrics!
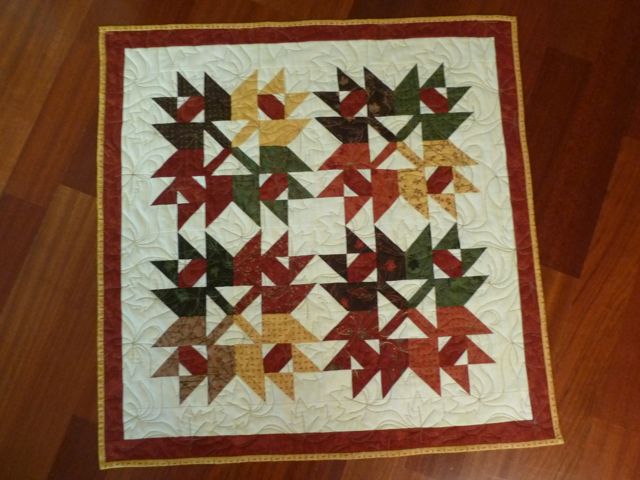
Maple Star Table Topper
Maple Star Table Topper
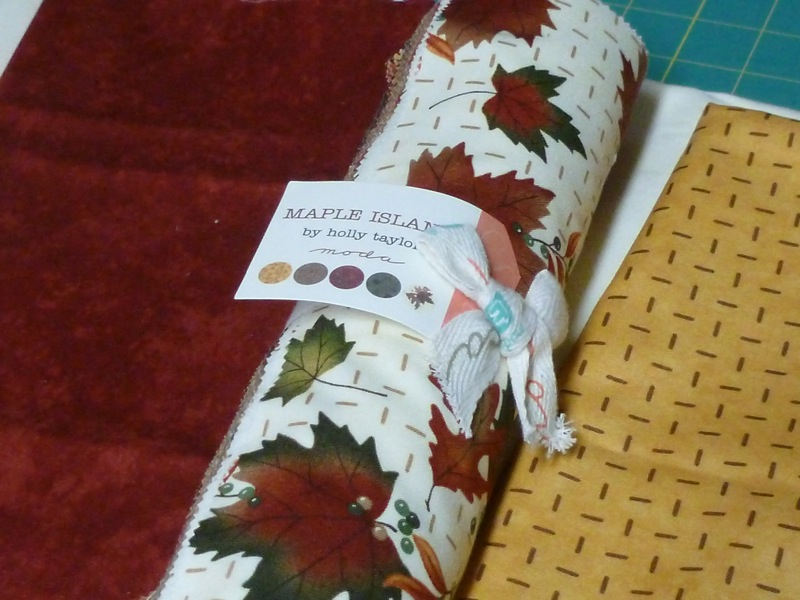
Autumn is my absolute favorite time of year with beautiful colors in the trees, cooler weather, football games, wearing sweaters and good home cooking on a pretty table. I just love autumn themed quilts and home decor. It is thrilling to share one of my designs with you, and to sew with these gorgeous Autumn themed prints from the Moda Maple Island collection by Holly Taylor.
This makes a 31" square mini quilt.
One Maple Island Layer Cake 6610LC Moda Precut (leaves)
3/4 yard Maple Island Cream 6617-12 (background and first border)
1/4 yard Moda Maple Island Sumac 6617-11 (outer border)
1-1/4 yards Maple Island print - I used gold 6615-17 (backing and binding)
Cutting
Pull out the Sumac and solid Cream layers from the layer cake and cut the following -
Cut each one into sixteen 2-1/2 inch squares.
Pull 16 cake layer fabrics for leaves. Cut the following from each of the 16 prints -
Two 3-inch squares
Four 2-1/2 inch squares
Moda Maple Island Cream background - cut the following
Thirty-two 3-inch squares
Thirty-two 2-inch squares
Thirty-two 1-1/2-inch squares
Two strips 2-1/2 inches x 24-1/2 inches (border)
Two strips 2-1/2 inches x 28-1/2 inches (border)
Moda Maple Island Sumac print (red marble)- cut the following
Two strips 2-inches x 28-1/2 inches
Two strips 2-inches x 31-1/2 inches
Maple Island Backing print - cut 4 Width-of-Fabric strips 2-1/2 inches wide to make binding. Set the rest of the yardage aside for backing.
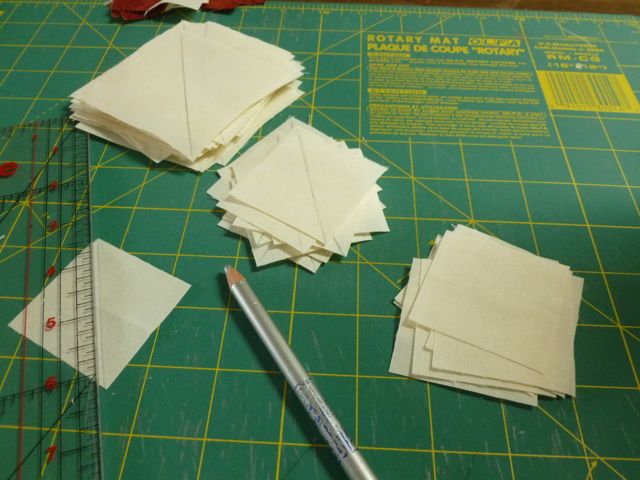
Begin by drawing a line diagonally from corner to corner on the wrong side of the 3-inch, 2-inch, and 1-1/2-inch sizes of the cream background squares. The 2-1/2-inch squares will be used as squares so do not mark those.
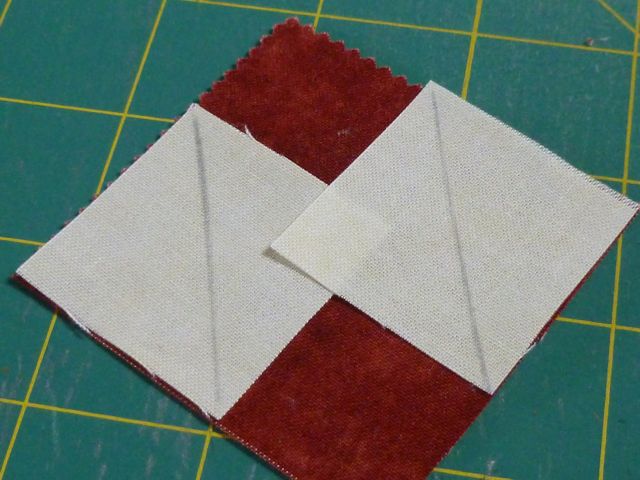
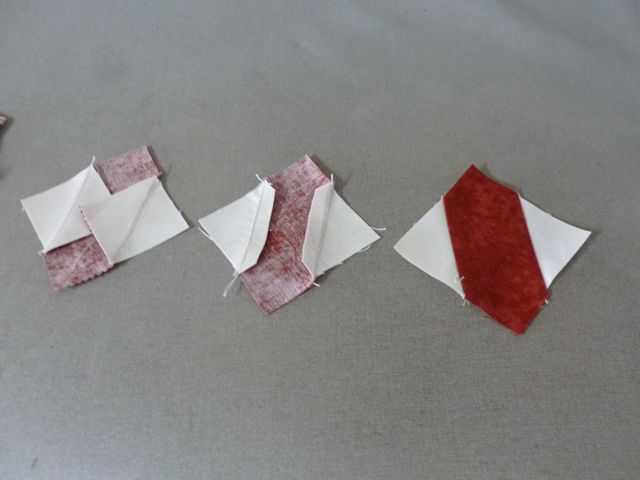
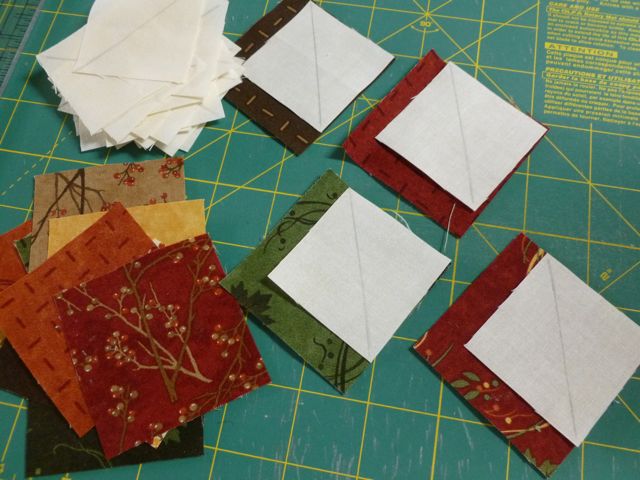
To make the accent element, pair each 2-1/2 inch Sumac (red) square with two 1-1/2 inch background squares. Place one cream square in a corner, with the line running edge to edge (not into the corner) right sides together.
Sew ON the line or just a thread’s width on the outer corner side of the line, trim the corner and press to the red. Repeat with another cream 1-1/2 inch square on the opposite corner. Trim and press to the red. These elements should measure 2-1/2-inches square when done. Make 16.
Make the Half Square Triangles for the leaf points. Match one of the 3-inch background squares to one 3-inch leaf print square right sides together. Sew 1/4 inch AWAY from the line on both sides. Cut apart and press the seam to the print side. Square to 2-1/2 inches using a square ruler, keeping the ruler’s diagonal line on the diagonal seam. You should have four HSTs of each leaf print (total 64).
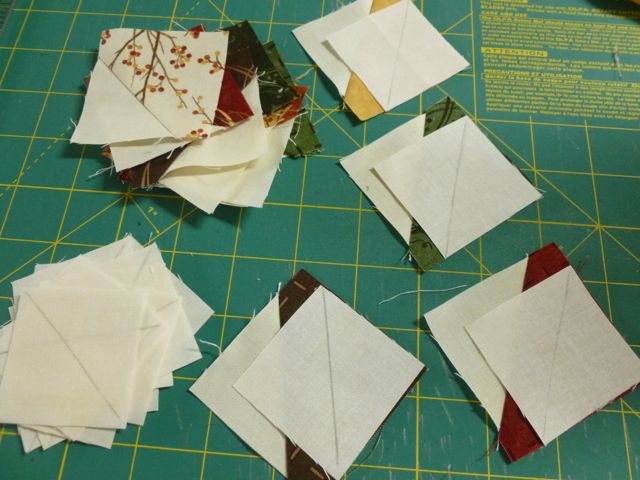
To make the stem element, pair one 2-1/2-inch square of each of the 16 leaf prints with two 2-inch cream background squares. Place one cream square in a corner, with the line running edge to edge (not into the corner), right sides together. Sew ON the line, trim the corner and press to the print.
Repeat with another cream 2-inch square on the opposite corner. Trim and press to the print. Repeat making one of each print. These elements should measure 2-1/2-inches square when done. Make 16.
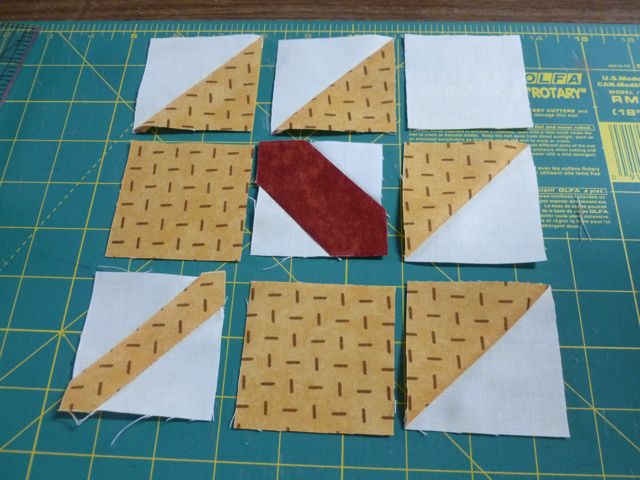
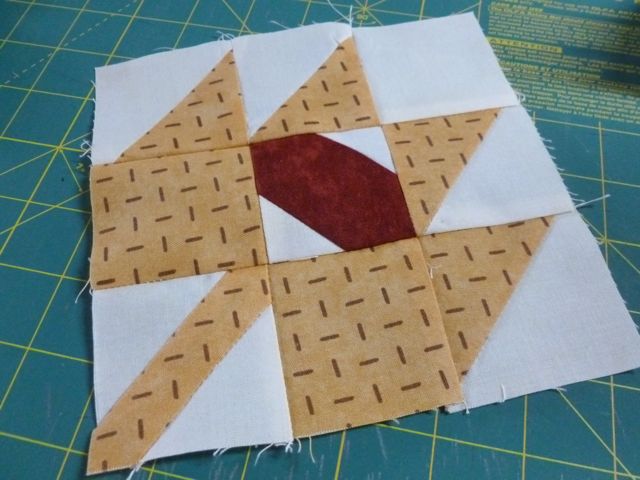
Lay out each leaf print's elements (4 HSTs, stem, and 2 print squares) with one 2-1/2-inch cream square, and one Sumac accent square.
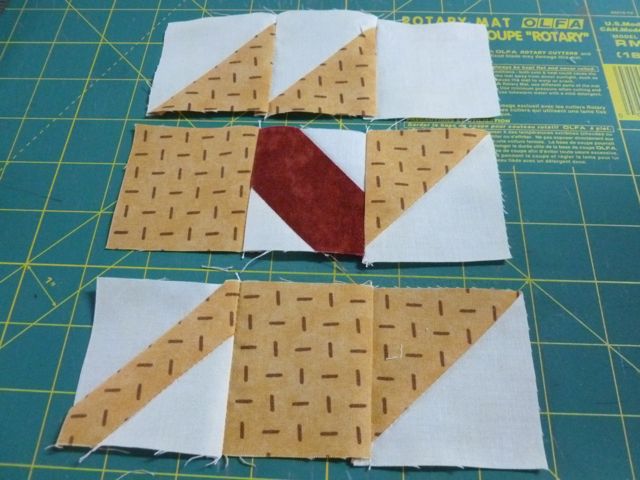
Assemble each leaf by following the pictures. Be sure your Sumac accent element is placed correctly on all the blocks (the cream point should point to the cream square).
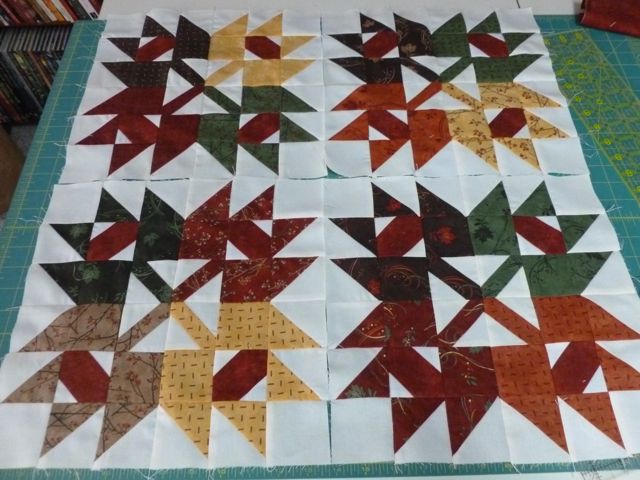
Arrange the 16 leaves into four blocks of four leaves each, with the stems all toward the center. Play with the prints in various positions to be sure the leaves are placed in a pleasing way, distributing the darks and lights, and various prints as you like. Sew the four blocks. Each one forms a star.
Sew the blocks together. An additional star will appear in the middle.
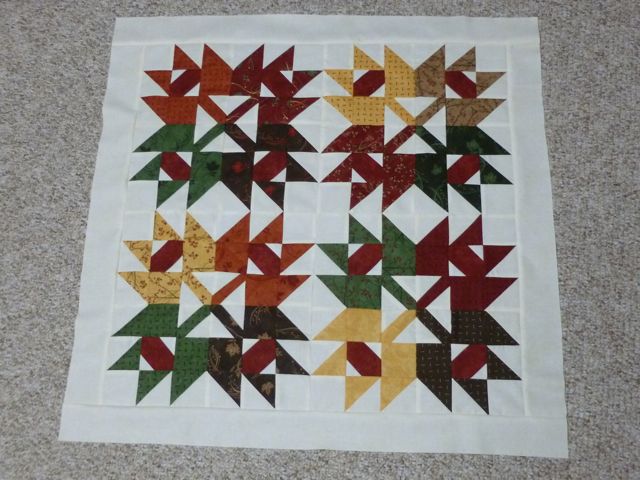
Sew the 24-1/2-inch cream strips to opposite sides of the blocks to begin the first border. 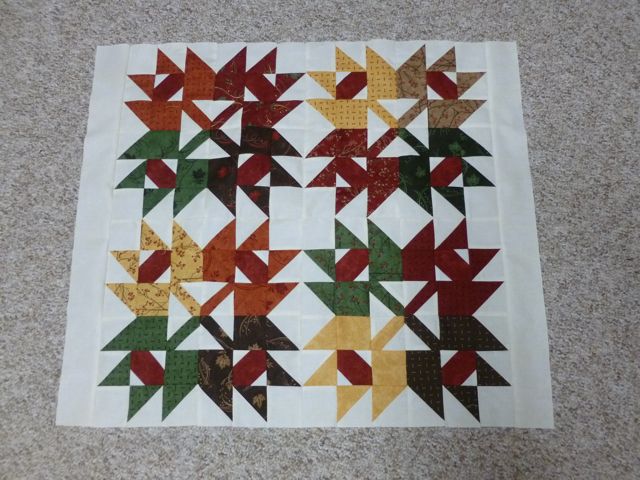
Sew the cream 28-1/2-inch strips to the other two sides to complete the inner border.
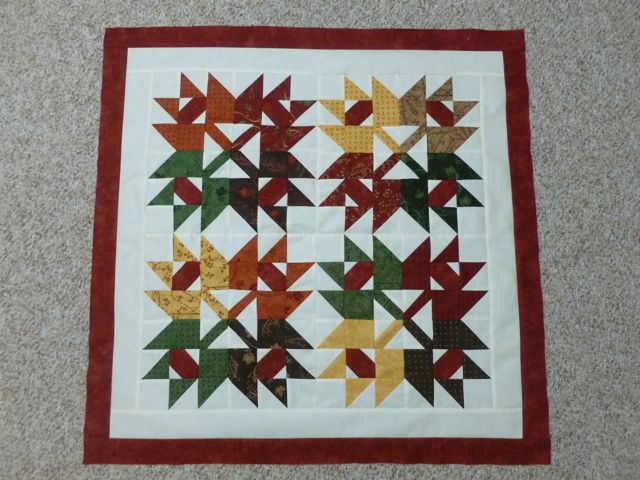
Sew the Sumac (red) 28-1/2-inch strips to opposites sides of the topper to begin forming the outer border. Sew the 31-1/2-inch strips to the remaining two sides to complete the outer border.
Layer the topper with batting and the yard of gold print. Quilt as desired. An allover design works well. Stencils in a 12-inch size could also be used on the four-leaf blocks. The project is small enough to easily free motion quilt on your DSM. Those with longarm machines will find a lot of opportunity for custom quilting design.
Trim away the excess batting and backing. Sew the binding strips from the gold print together for the binding. Press seams open and then press the binding in half. Apply to the edge in the usual manner. Turn to the backside and whip stitch.
Don't forget to add a label!
One 31" square table topper or small wall quilt.
Ready to enjoy throughout the fall season, and a nice addition to a holiday table.
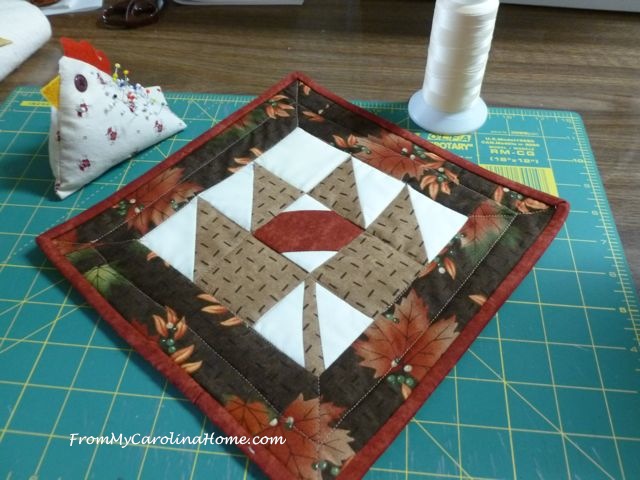
Bonus! - With your leftover cake layers, you can make some leaf hot pads, using the same design. Just use a cake layer cut into four 2-inch strips for a border, layer with InsulBright batting for heat resistance and a backing. Quilt with stitch in the ditch. Use an additional cake layer cut into 2-1/2-inch strips joined with 1/4-inch seams for binding.
Enjoy!
Carole Carter
{frommycarolinahome.com}


