Welcome to Moda!
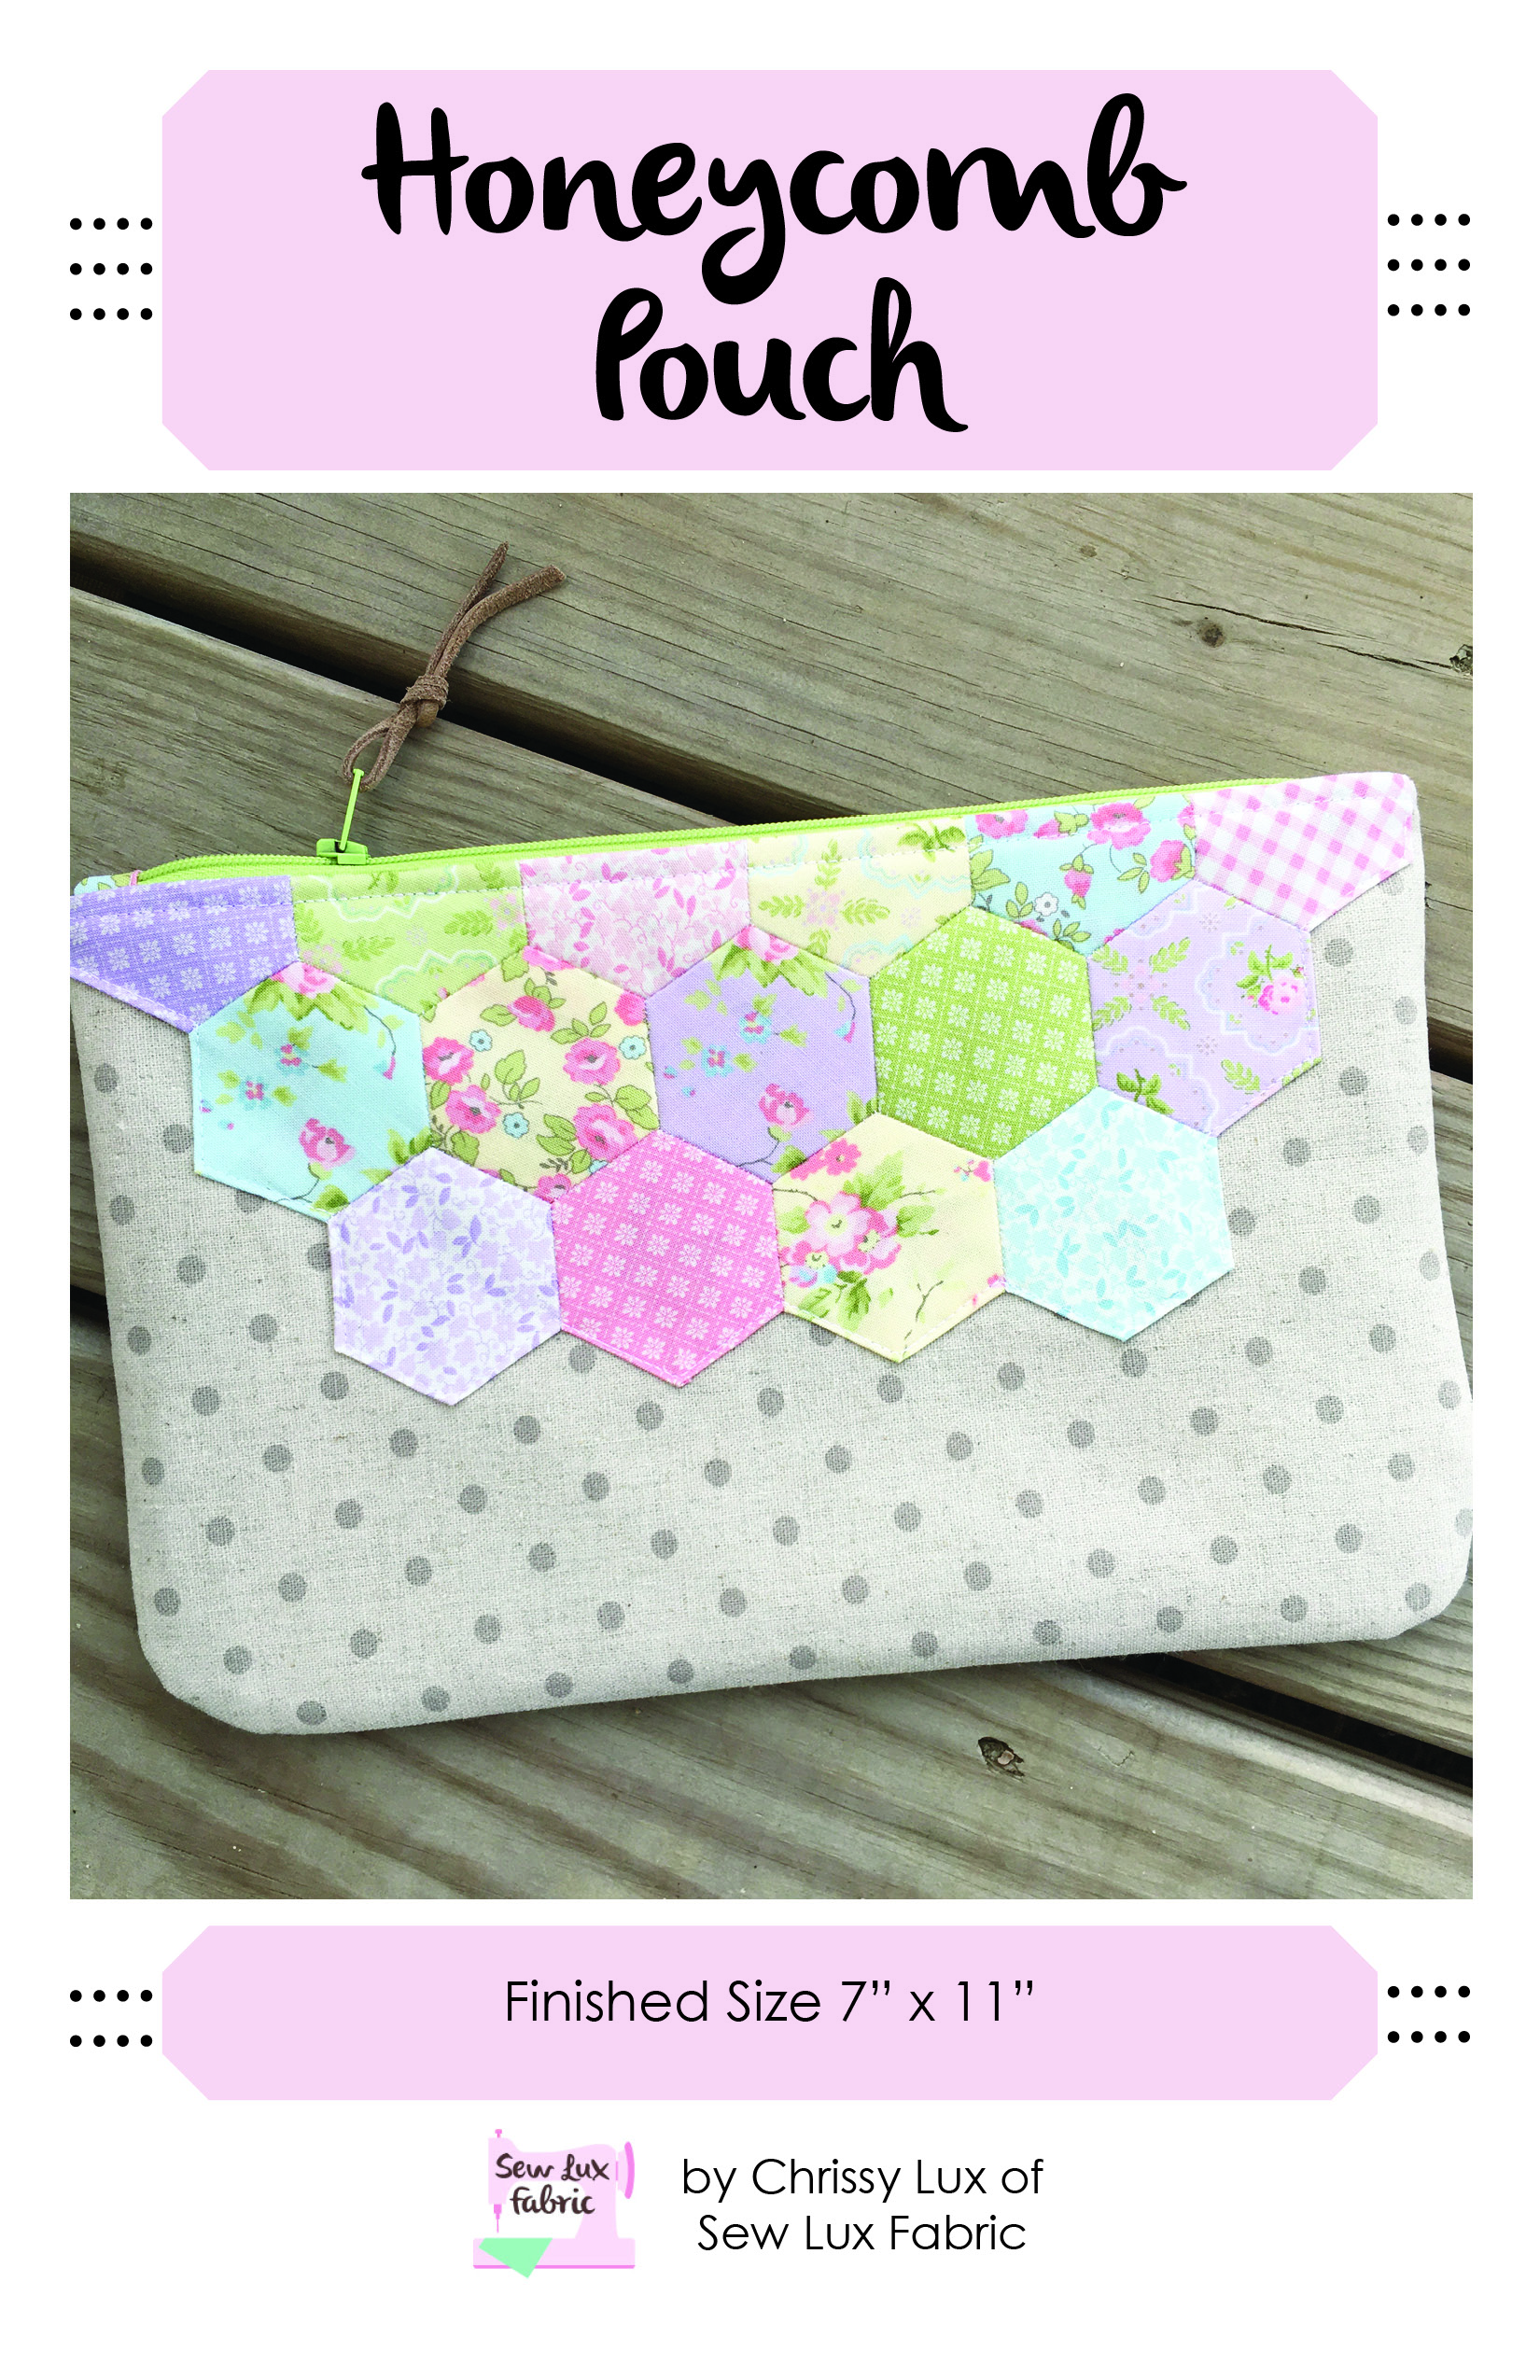
POUCH CLUB: HONEYCOMB
POUCH CLUB: HONEYCOMB
Published:
Sep 19 2024 - 09:30
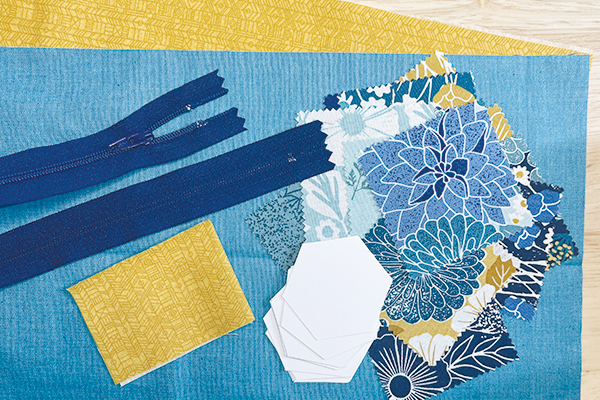
Materials Needed:
You will need the following to complete this project:
- 1 Mini Charm Pack
- 1 Fat Quarter Exterior (Linen or Crossweave works great)
- 1 Fat Quarter Lining
- (1) 12" longer zipper
- 1/3 yard SF101 interfacing, fusible fleece, or similar
- Honeycomb Pouch Pattern SLF1710*
- 1" Hexagon Papers
Paper and PDF patterns as well as kits are available in our shop at Sew Lux Fabric or ask your local quilt shop to carry the paper pattern and kit one up for you!
This project is great for Mini Charm Packs, scraps and leftover Jelly Roll strips! For this example, I am using the Field of Flowers collection (coming in October) by Katharine Watson and Crossweave in Scuba (sku 12216 22).
Step 1: Piece the Pouch Exterior
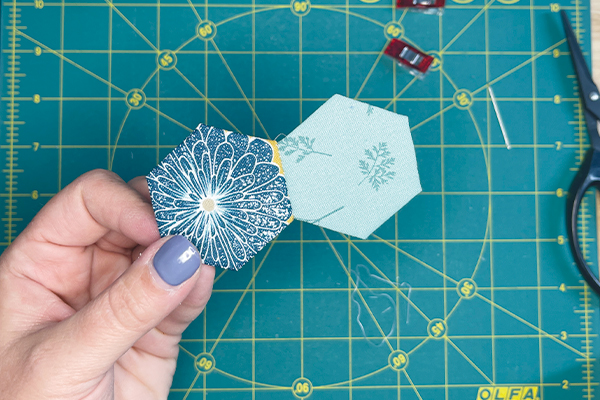
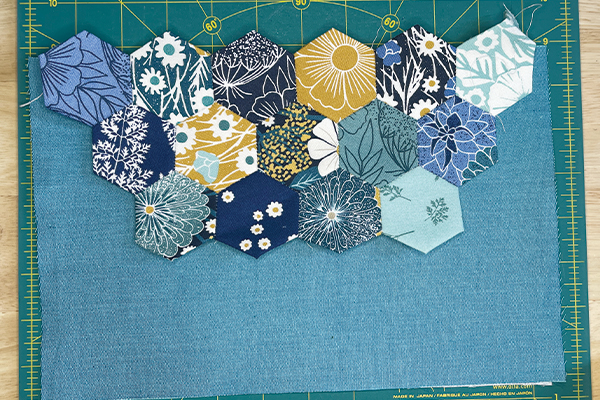
Follow the directions in the pattern to create a hexagon template or use precut 1" hexagon papers like the ones shown from Paper Pieces. Baste the Mini Charm squares to the hexagons in your preferred method. Some people like to use a washable glue stick or you could thread baste them in place (like shown below). I like to give them a good press after basting to help hold the shape.

Once you've basted the 15 hexagons you need, lay them out as instructed in the pattern to determine how you want to place them. Note that the "points" will point north-to-south and not east-to-west.

To sew them together, you will place two hexies right sides together and whip stitch the seam by hand. You'll continue joining the hexies to create three rows (4, 5, and 6 hexies).
Note: If you are brand new to English Paper Piecing (EPP), check out this Basics video from Paper Pieces.
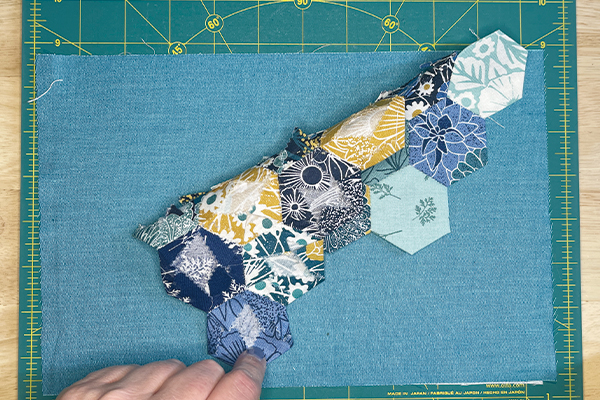
Join the rows together and then carefully remove papers and press well.
Adhere interfacing to the wrong side of the exterior rectangles.
Align the paper pieced section as instructed in the pattern and secure in place with pins.
Secure the hexagon patchwork by topstitching 1/8" from the outside edge. You can add additional decorative stitching as well, if you'd like.

Add a line of stitches along the top edge to secure. And trim the excess patchwork even with the top edge of the exterior.

Shape the bottom corners of the pouch exterior and lining as instructed in the pattern. Trace the template provided or use the bottom of a glass or similar sized object to create the curve.
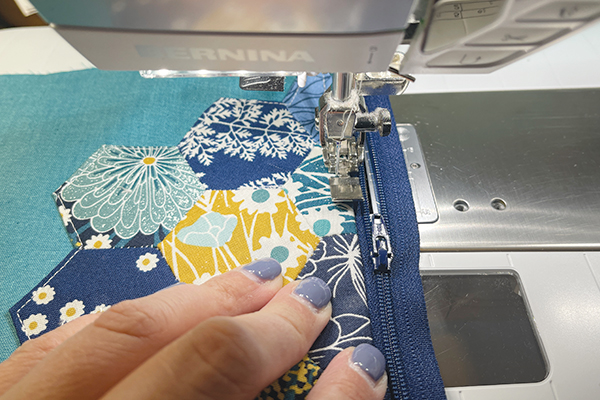
Step 2: Prepare & Install the Zipper
Follow the directions in the pattern to make and add tabs to the ends of the zipper.
Align the zipper (face down) with the top edge of the pouch, centering it and leaving about 1/2" on either side. The lining will go RST on top to sandwich the zipper betewen the layers.

Install the zipper using a zipper foot and top stitch the exterior & lining in place.
Repeat this process with the opposite edge of the zipper and backing rectangle.

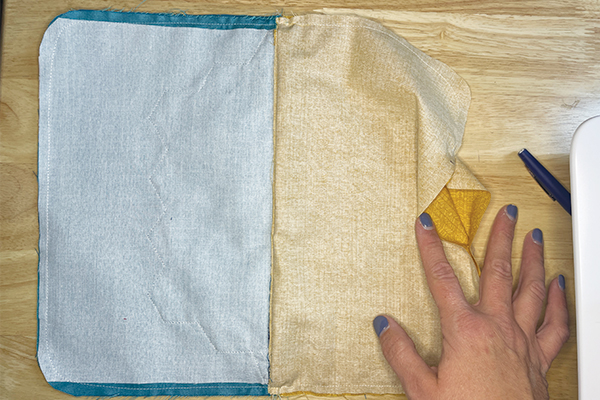
Step 3: Finish the Pouch
Arrange the pouch so that the exterior is RST and the lining pieces are RST. Make sure the zipper is half open and pin or clip in place around all four sides. Sew all the way around, being sure to leave a 3-4" hole in the bottom of the lining. Note that you will sew next to, but not through the zipper tabs.
Carefully turn the pouch right side out and use your fingers to push the corners out. (By sewing next to and not through the zipper tab, you're able to get a nice, square corner.)
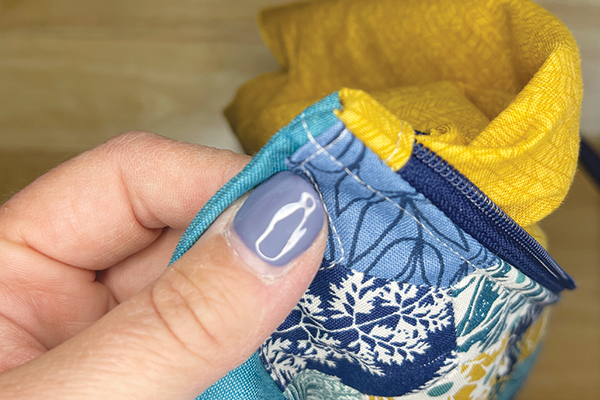
Press well and close the opening by hand or machine.
Your finished pouch is now ready to use and enjoy!

Next month, we will be making the Cork Bottom Pencil Pouch, a Mini Charm Pack or scrap friendly project! See you back here on October 17th for our next installment of the Pouch Club Series.

Posted in: